| |
![]()
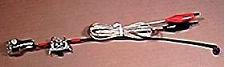
 Construction
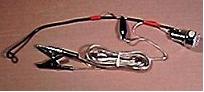
A clip is used in place of the switch.
Final result with high-low slide switch (center position is off):
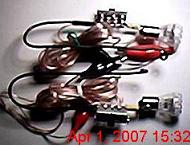
Close up on the wiring.

Strip the insulation off number 12 or 14 solid wire for a 2 inch distance from one end of a 12 inch cut section of wire. Cut off a .25" section of the
insulation and put it back on the end of the stripped bare wire. Slide it down so that about .25" of bare wire shows. Solder this to the base of the
LED. Solder one side of the switch to the wire large copper wire. Solder the 18 gauge speaker wire copper color to the center of the 1156 bulb
or to the brightest terminal of an 1157 or multi-terminal bulb. Solder the 51 ohm across the front terminals (ones closest to bulb) and solder the
510 ohm across the back terminals. Bend the bolt tabs up on each end of the switch to provide a flat area to push against. Make a loop in the end
of the solid 14 gauge wire for fasting to the wall.
The slide switch can be purchased from http://www.allelectronics.com/ Search for the part number "SSW-37" $.25 to $.33 depending on
quantity.

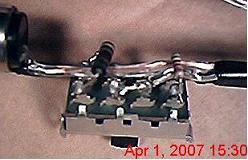
How the slide switch looks when wired. Note the tabs on the top of the switch are bent up to give a surface to push against.
Don't bother buying bulb sockets; instead solder directly to the bulb your power lead wire. I soldered a number 12 solid wire to the side of the
base that is about 6" to12" long that has a small loop bent into the other end. This is used to fasten it to a wall with a wood screw and washer. The
stiff wire is intended to be bent to direct the light to the users needs. Ends up with a high and low setting depending on if the 510 ohm resistor is in
or out of the circuit. In a pinch one can use a clip lead for the switch.
Offered by Mike.
